
ASUS ROG Ally… it runs ESXi
TLDR:- I WANT TO INSTALL MY OWN OS! Get a USB dock and keyboard, plug it in and bash Escape for your life 😀
So I was very lucky to get my hands on the Asus ROG Ally on launch day and so far I am impressed with the device. I have had a few hiccups with games but then I get the same on my gaming PC so I am sure its just a driver glitch here and there. Overall though no major gripes with the unit apart from the fact I wish it just had more I/O or at least one extra USB-C port
Also thanks to William and Florian for great posts referenced in here so that I could reference until I can get a full step by step done so others can have a go.
But back to the topic at hand… I was just super curious if the device could run ESXi and well in short yes it does

But there are a few hurdles you need to get past and you will still get errors during the installation but you can fix these post first boot.
Also do note you do not get the full amount of RAM and I assume this is down to it being shared with the APU of which I may try and tweak later.
What you will need:-
- 1 x ASUS Rog Ally
- 1 x USB-C Hub (Ideally with PD Power Delivery, this is the one I used)
- 1 x USB Keyboard
- 1 x USB Drive with ESXi and USB NIC Fling (I would suggest following Williams post here)
- 1 x USB Drive to install to unless you are willing to reformat the OS drive
- 1 x USB NIC thats on the VMware Fling List (I used this one)
- 1 x NFS/iSCSI mount for Virtual Machines
So first things first I had some issues getting into the boot menu holding down the volume down button but that said the boot selection menu can be found by pressing the Escape key on your keyboard during the boot up screen.
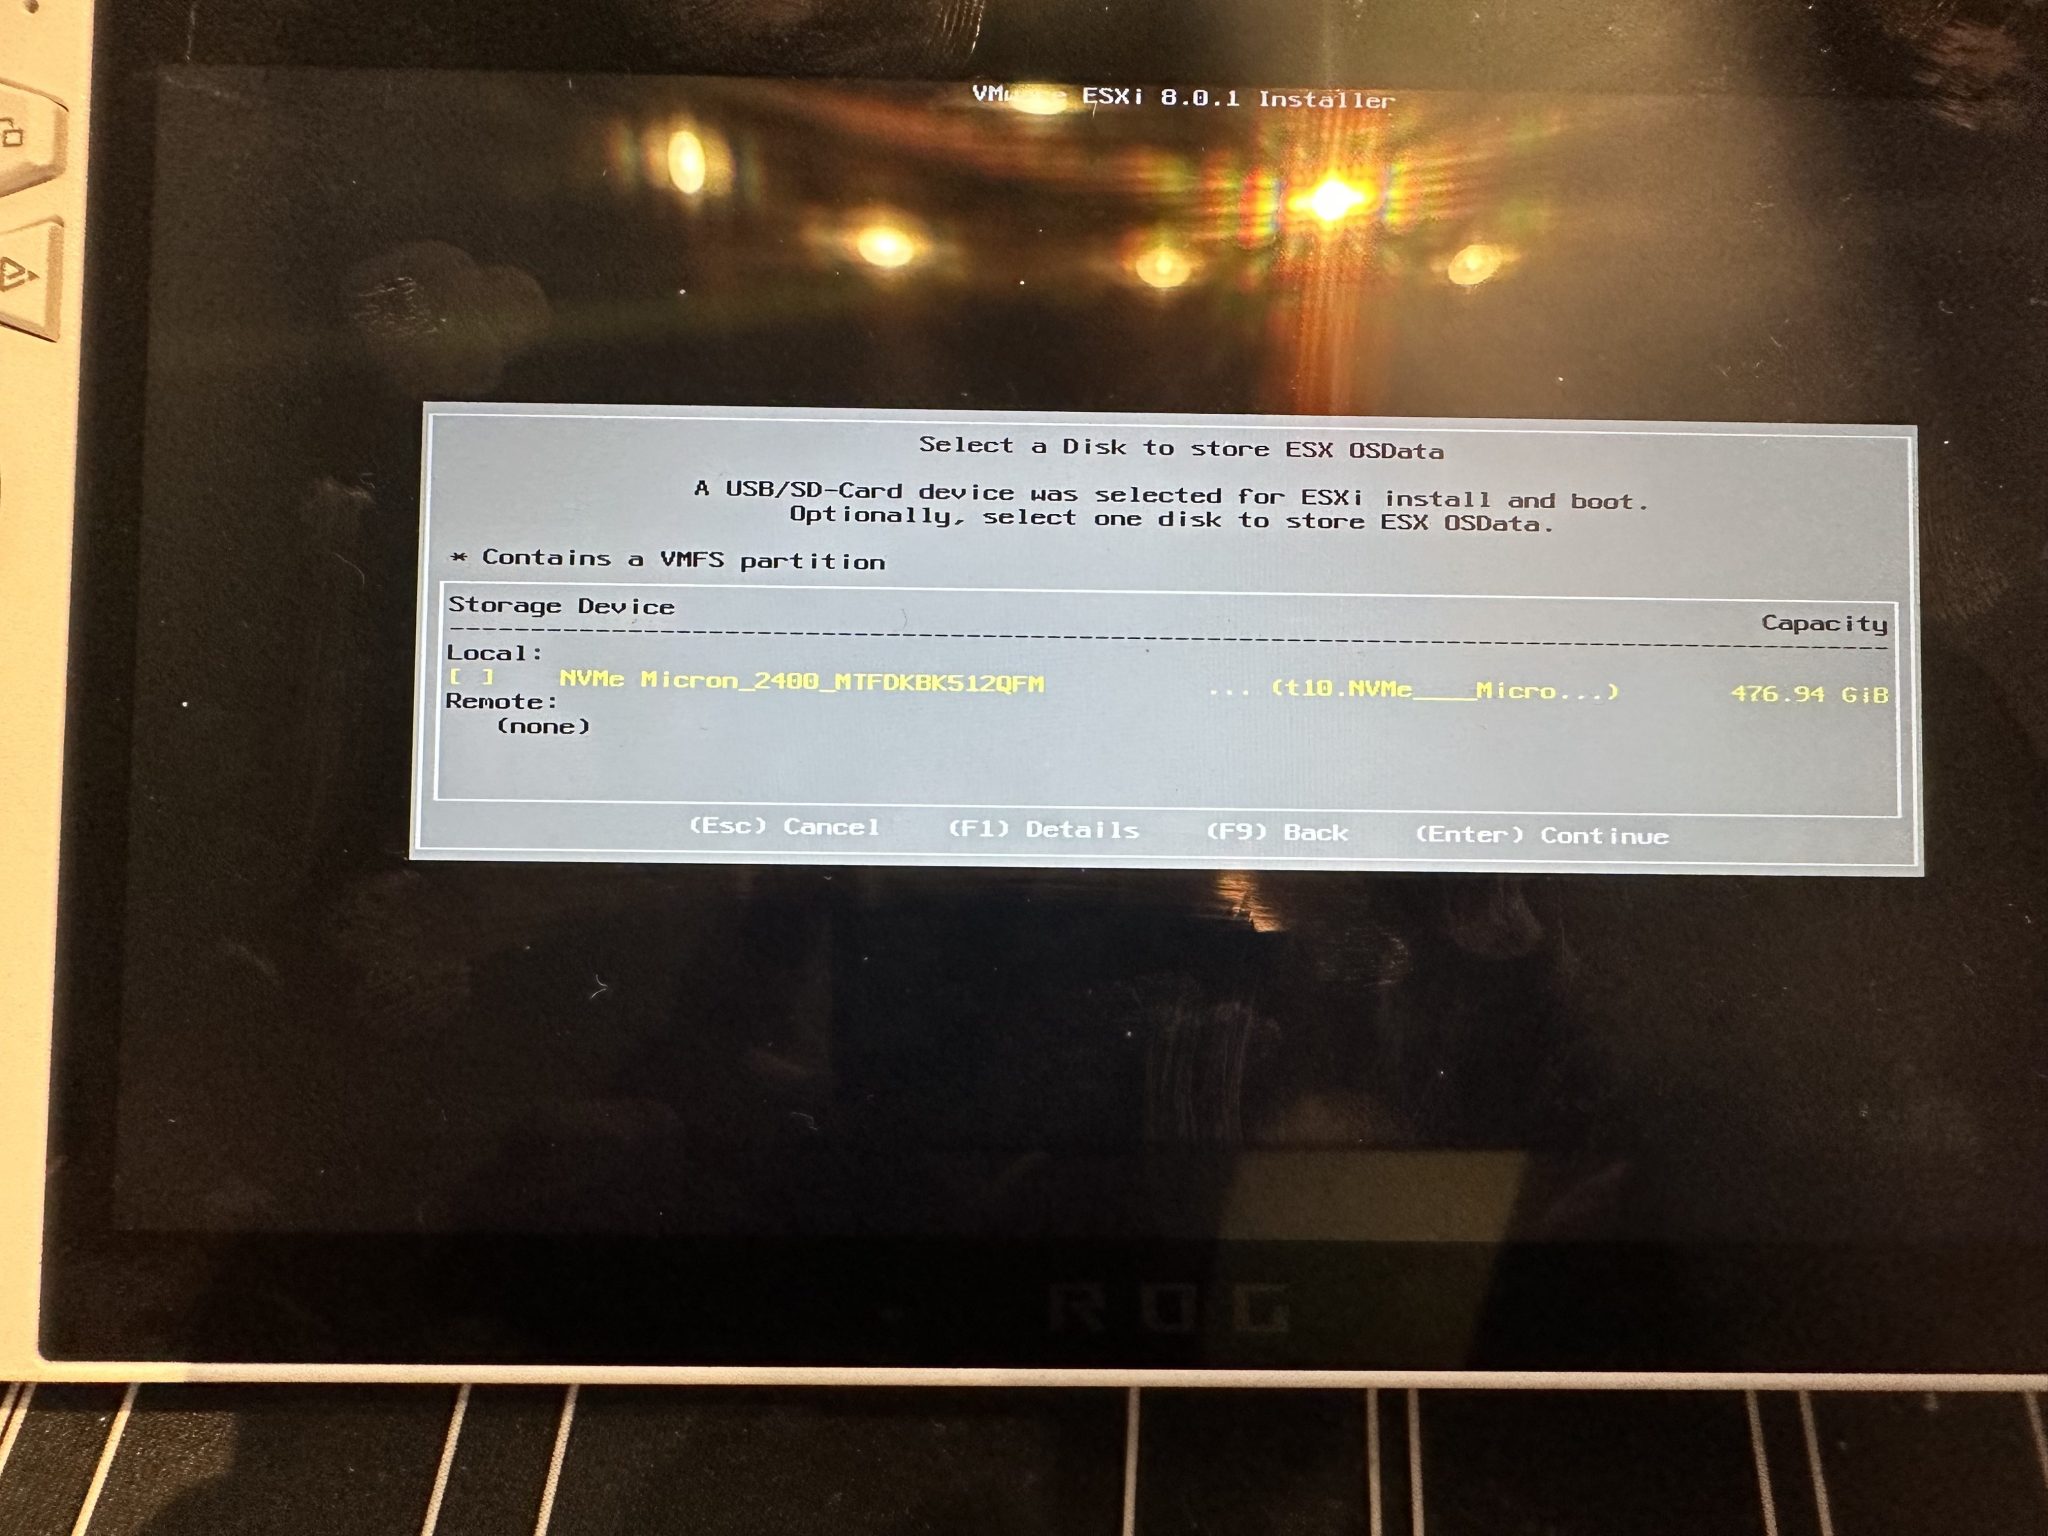
From here select the USB drive which has the VMware ESXi installer on, you may see two if you are using a USB key to install to so you have a 50/50 chance of getting this right. Also USB key installations are not official support by VMware and you will get this error below during the install

Also on this screen be super careful to not select/highlight this option or you will nuke your Windows OS installation
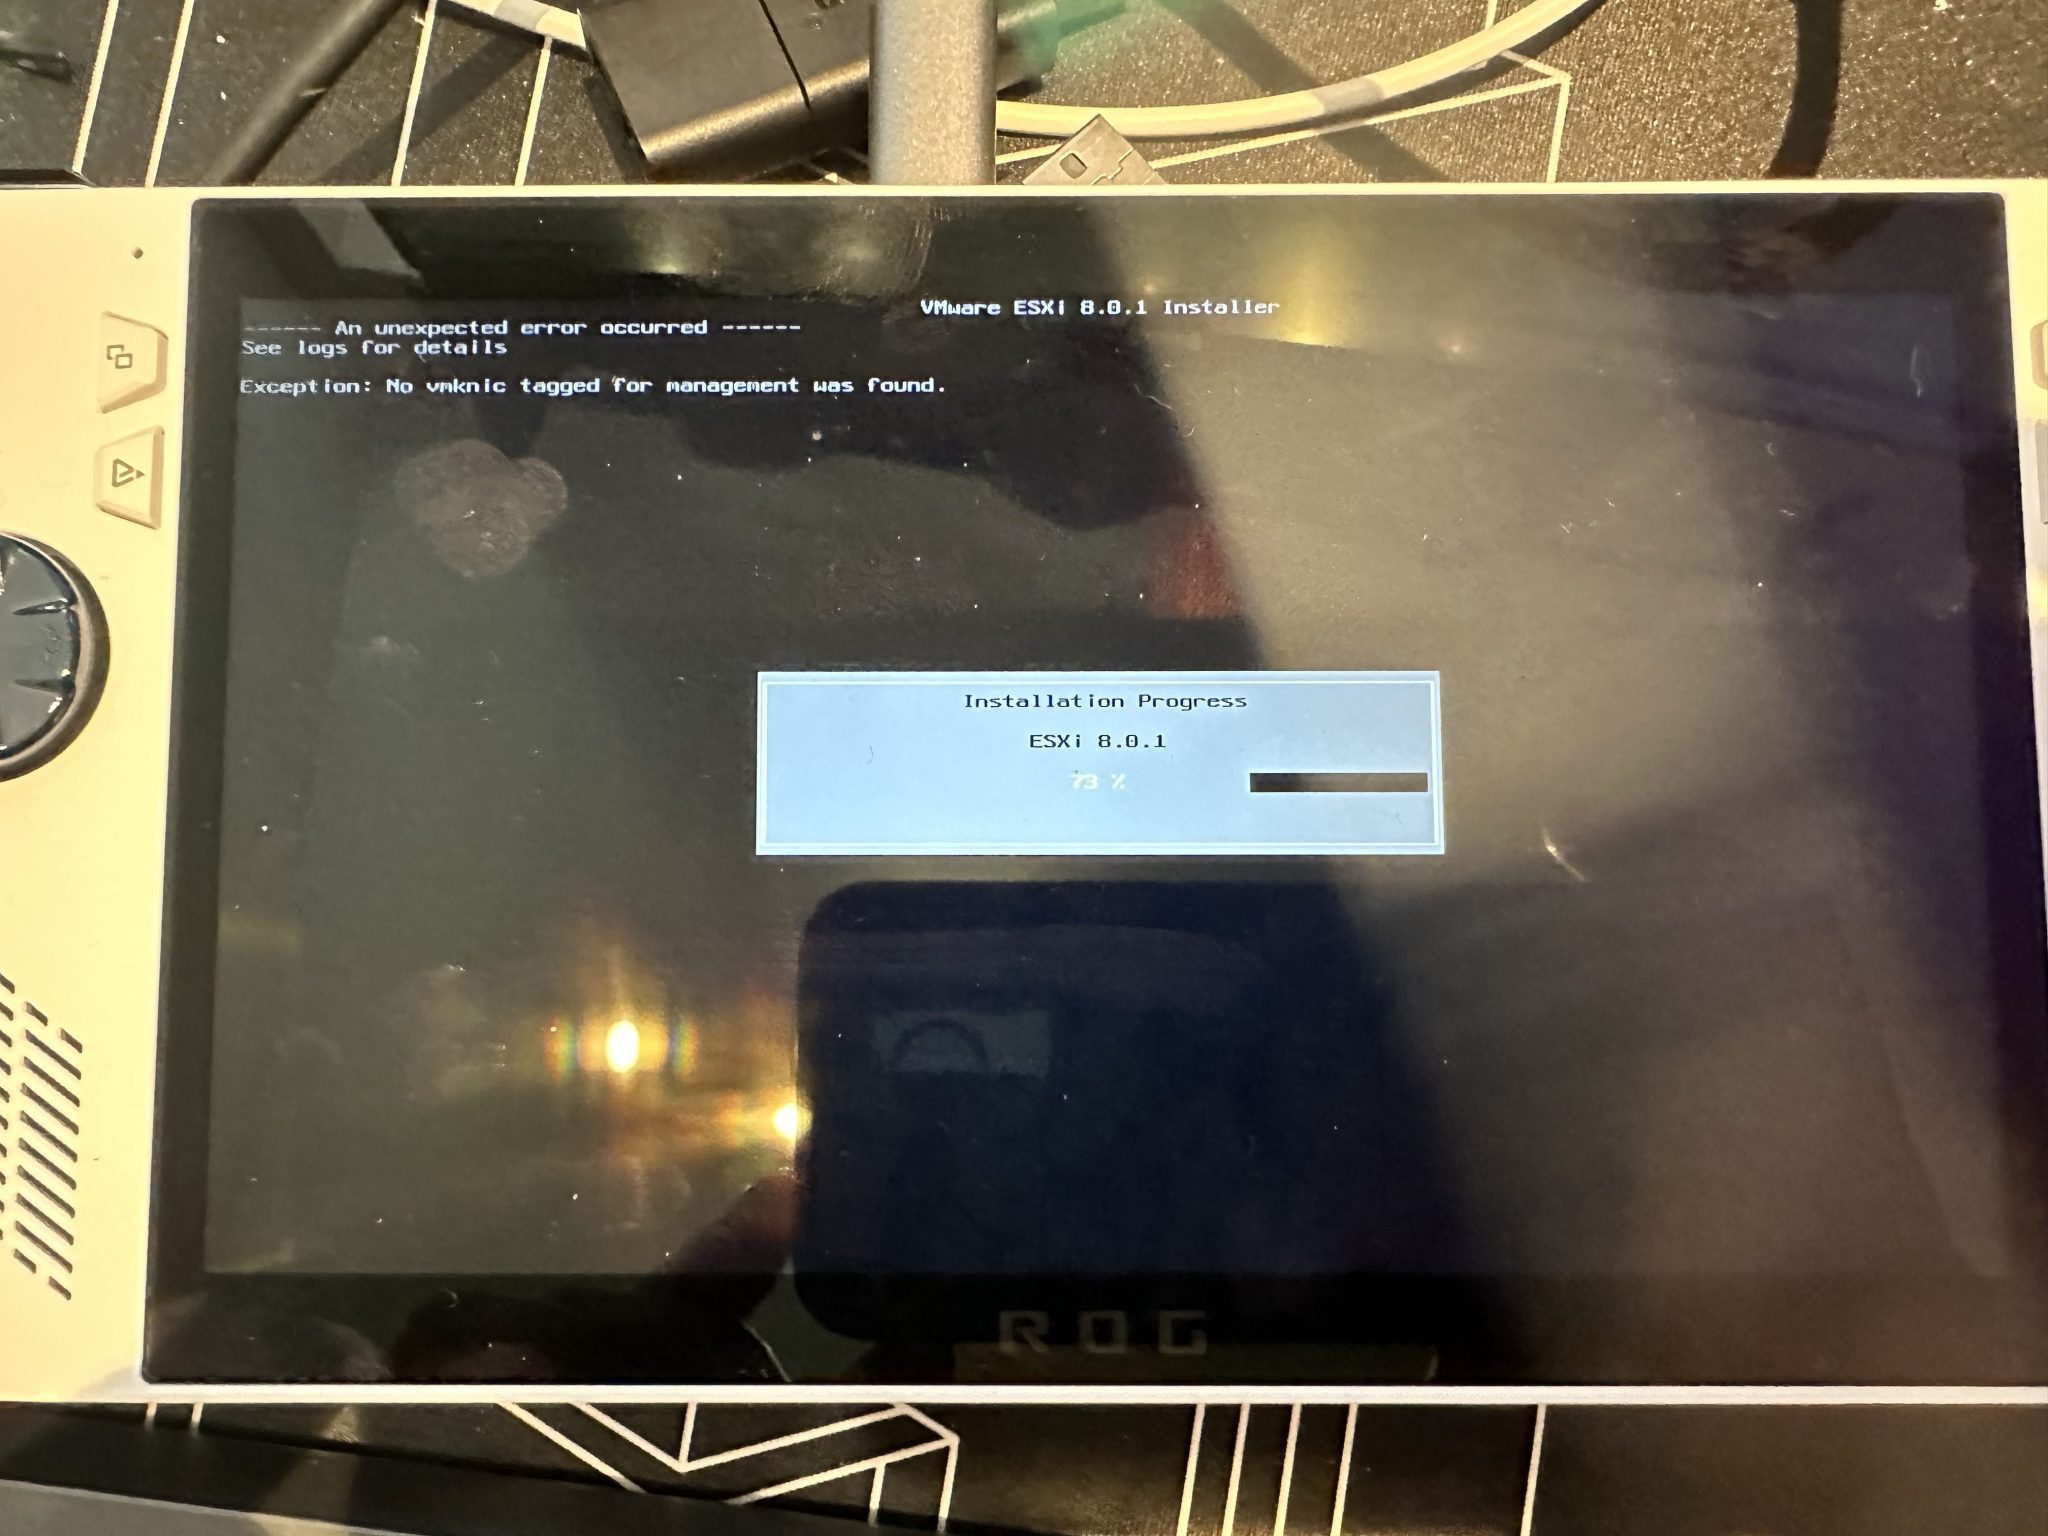
The install will eventually kick off and part way through you will get the below error, do not panic like I did. I forgot about this issue of which Florian goes over here. Do not worry because at this stage the main install has occurred so power down the unit, remove the installation media and then get back to bashing that Escape key so you can boot from ESXi drive.
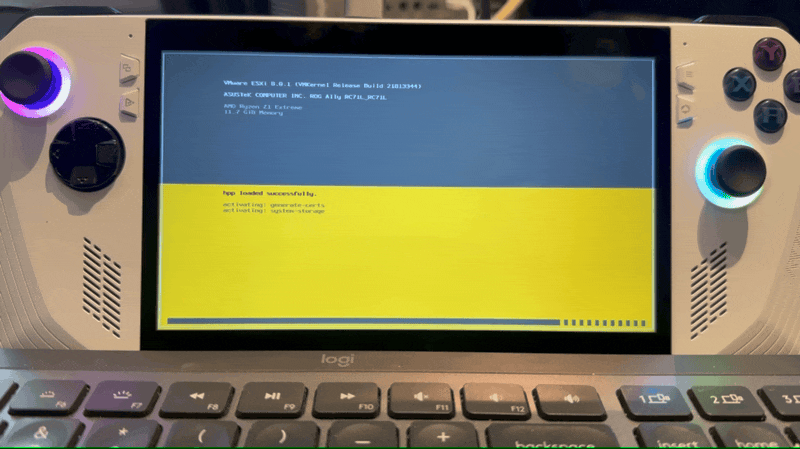
Hopefully you should now see ESXi booting, with mine at least I did not need to alter any BIOS settings to get this to work. This is the main GIF on my Twitter post and the header above. If you then follow the steps from Florian to reset the network settings when you head back should now see it has an IP and ready to connect. Don’t forget to change that Root password!
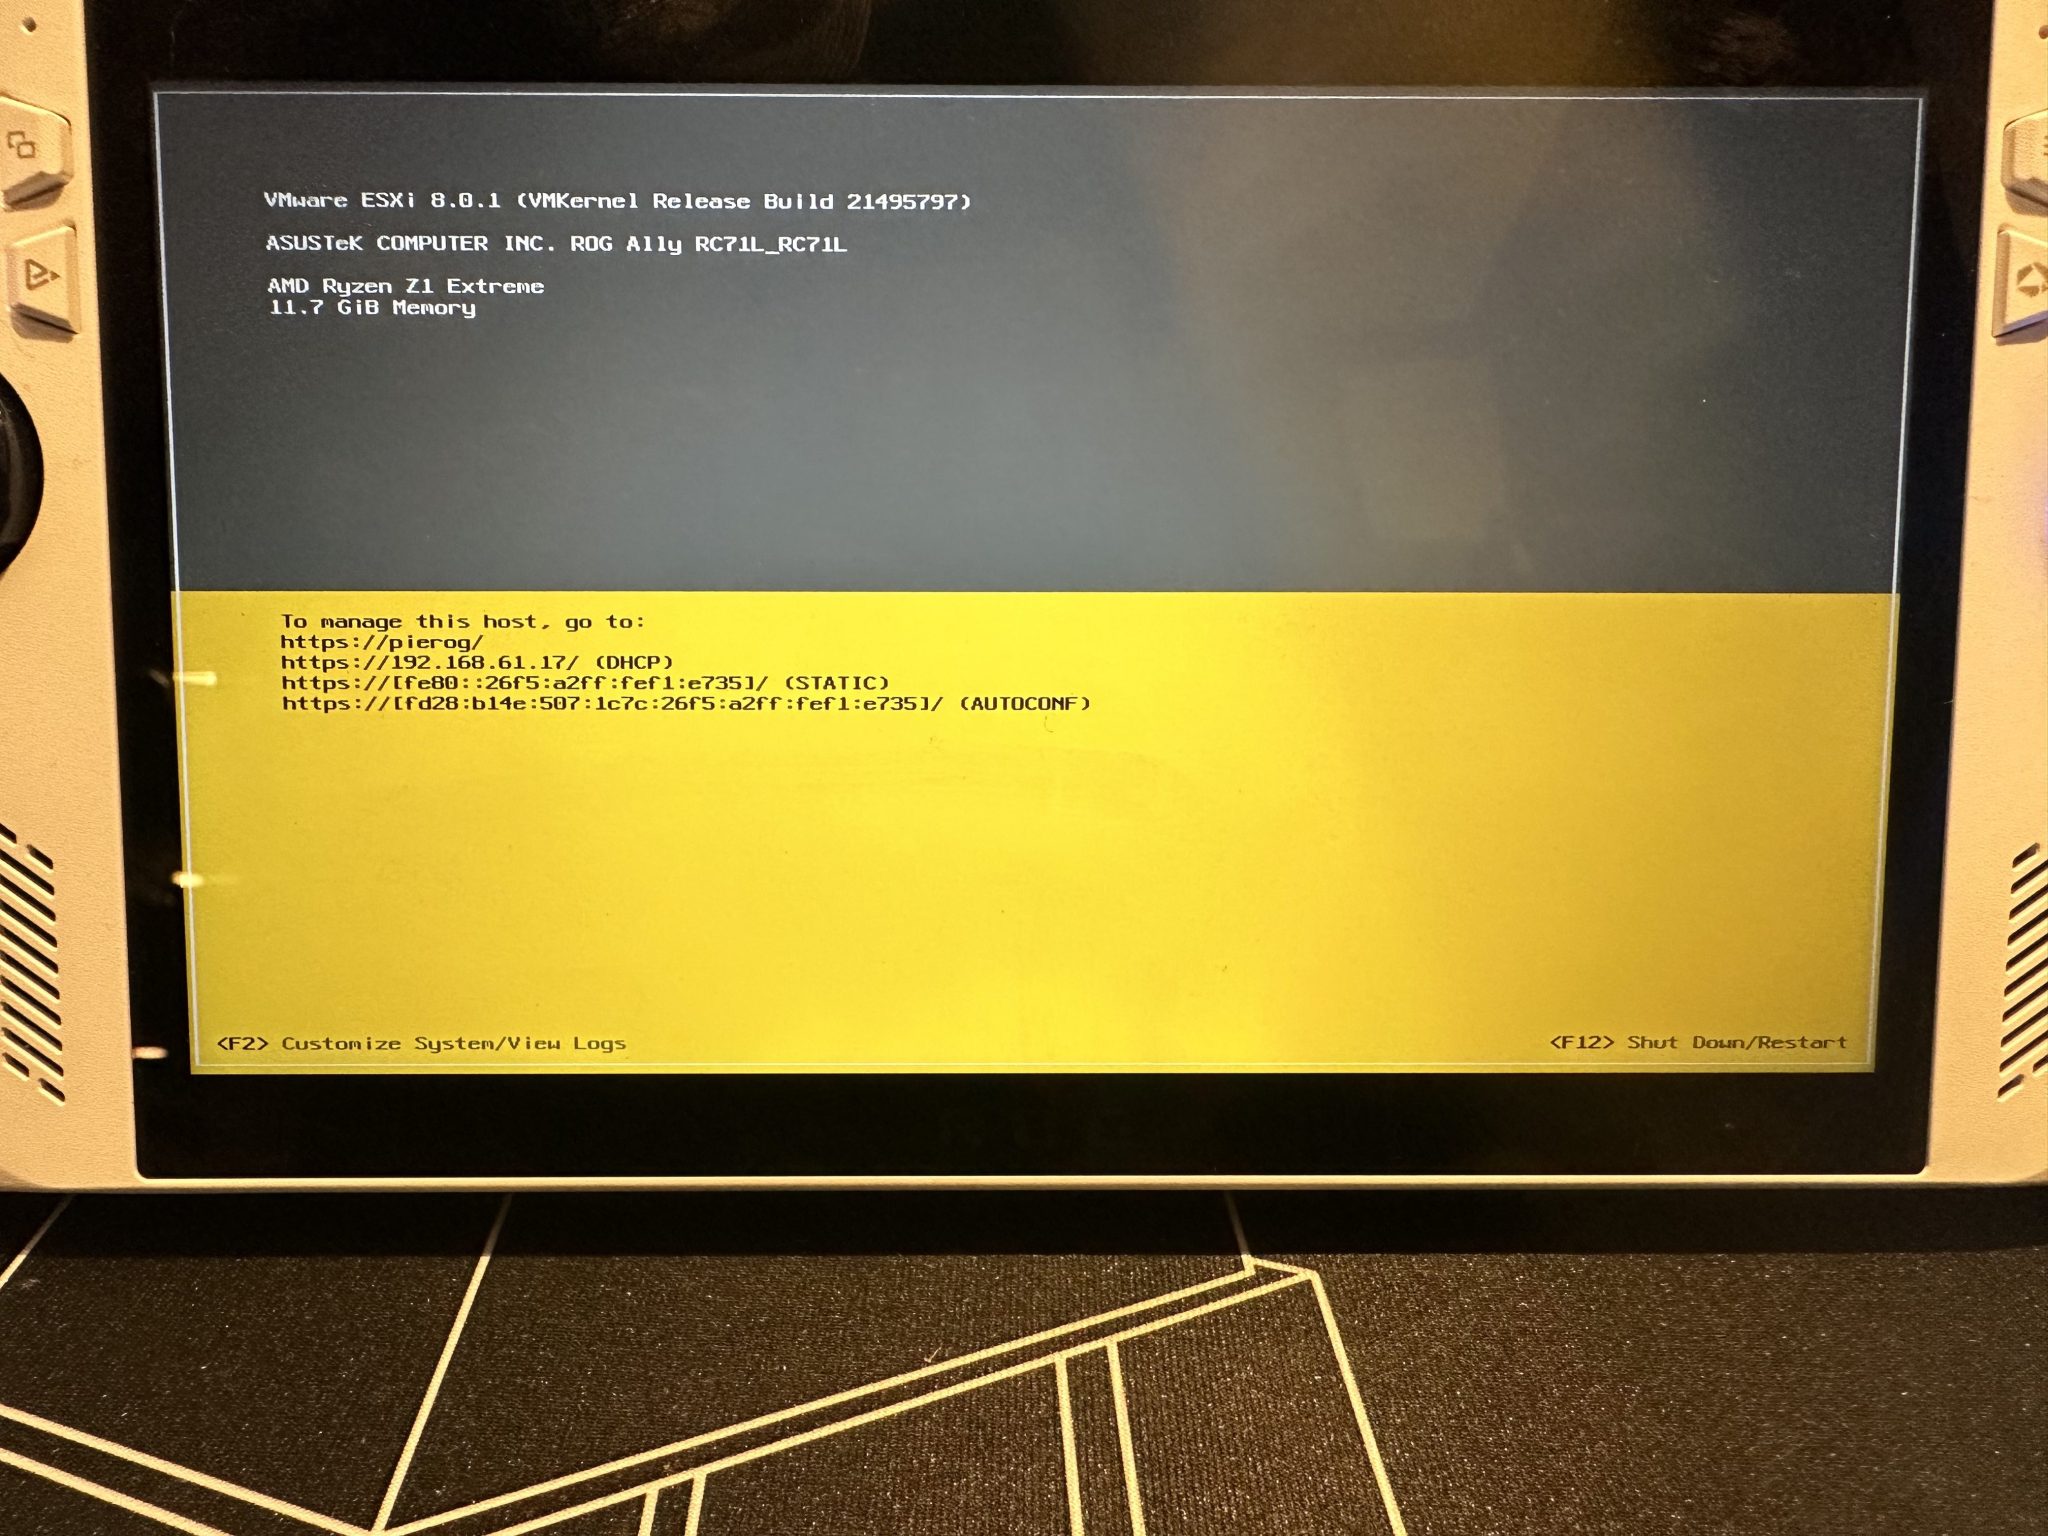
If you head over to the IP on screen you should now see the ESXi dashboard like below

You should then be able to attach your storage such as a NAS over NFS/iSCSI and create your first VM unless you have formatted your internal NVME. I would try this but I do not have a spare one to swap out at the moment.

As you can see my Windows VM is there ready to install. I fully appreciate that if you do not know ESXi well you may struggle with some steps but I will look to do a full step by step but I am also trying to enjoy the device for what I bought it for 🙂

You May Also Like

Apple iWatch 3 Cellular in the UK
